Create an SLA
This guide walks you end to end through building a working SLA: pick the goal, set targets per priority or by JQL, configure the clock, attach a calendar, scope it, then save and verify on a real issue.
One SLA definition = one goal (one promise, one clock). For separate promises such as "Time to First Response" and "Time to Resolution", create a separate definition for each. Keeping each definition to a single goal is deliberate — it keeps the clock simple to reason about.
Before you start
You need the manageSlas capability (or the Full configuration umbrella, or to be a Jira admin) to create and edit definitions. Open the Quartz hub from the Jira top-level apps menu and go to SLAs under CONFIGURE.
If you'd rather attach the timer to a specific working-hours calendar, set that up first under Calendars — Quartz ships two seeded calendars, default and a 24/7 calendar, so you can also just pick one of those.
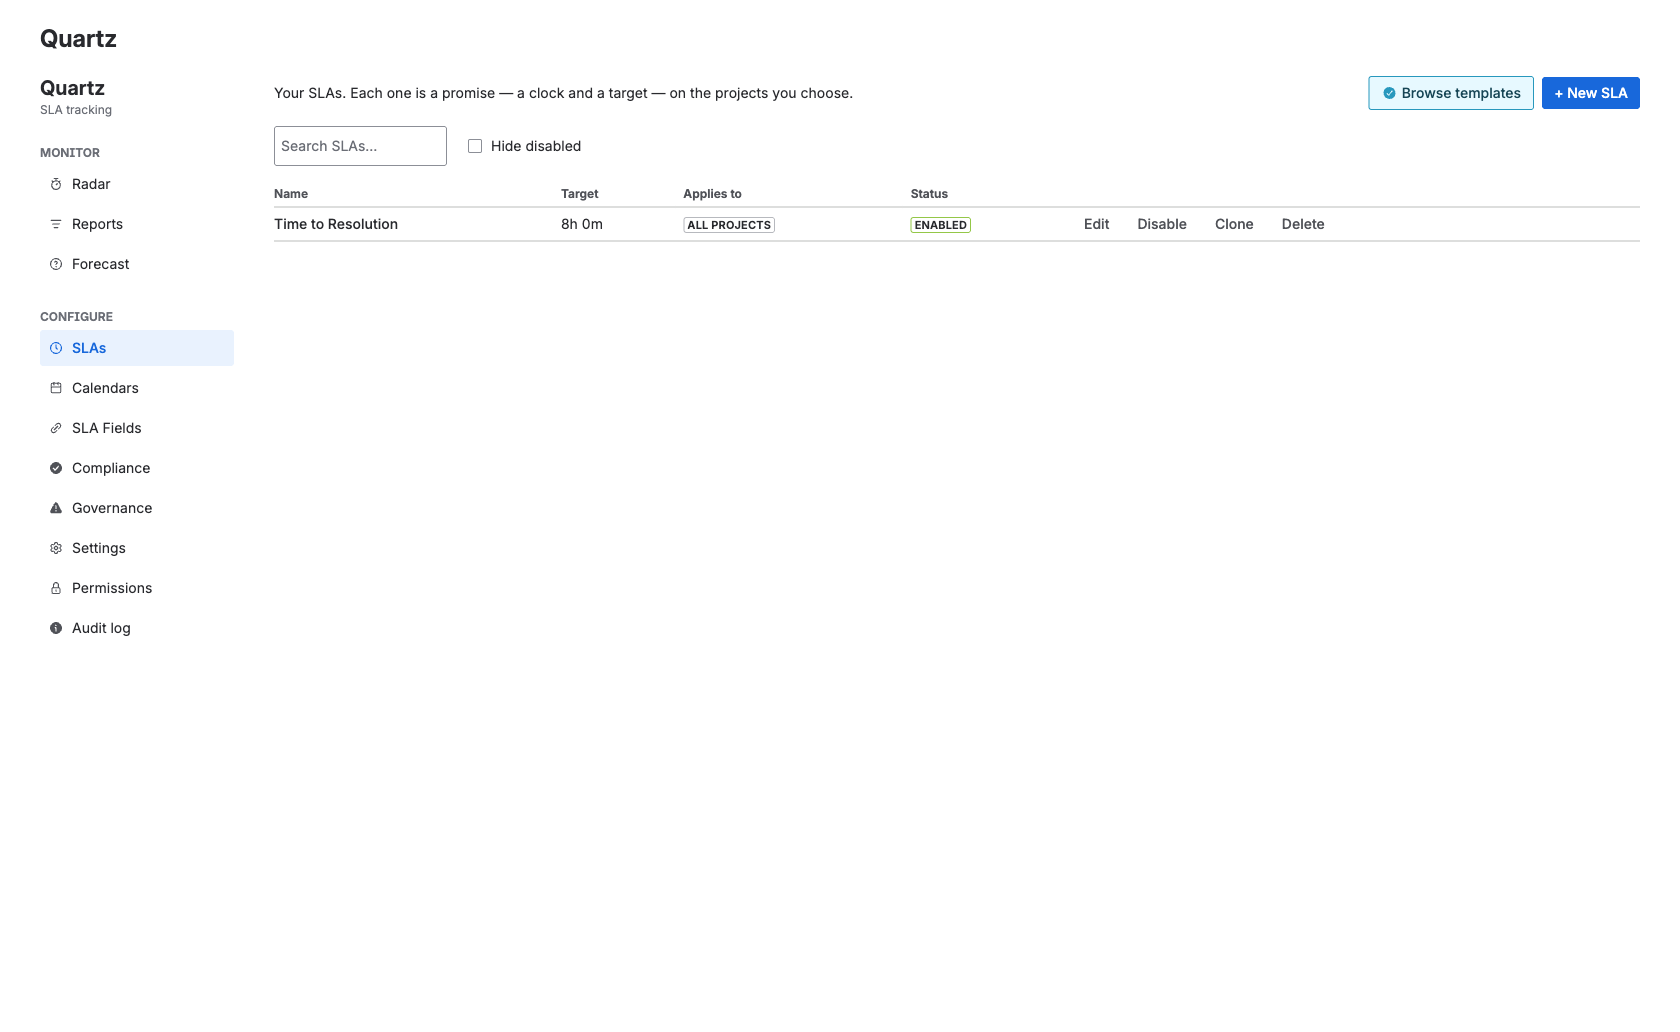
Step 1 — Pick a goal
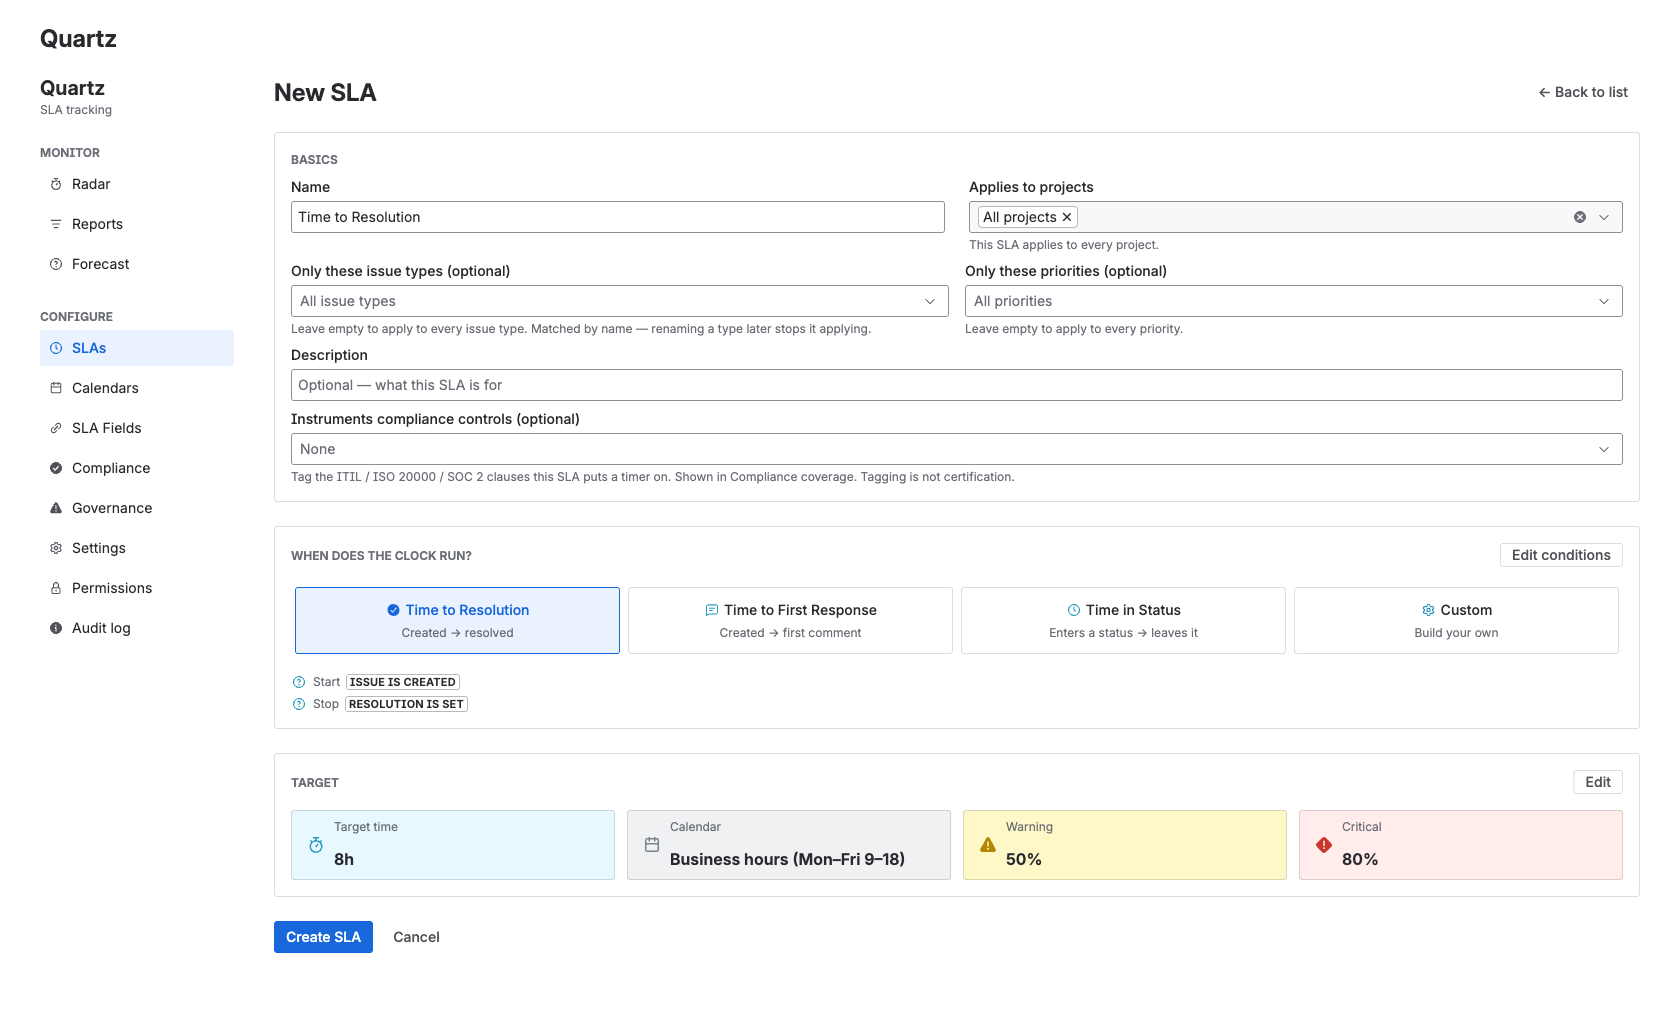
Name the goal and choose a target type
Give the definition a clear name (for example Time to First Response or Time to Resolution). Then choose one of three target types:
| Target type | Breaches when | Use it for |
|---|---|---|
duration | Business-elapsed working time exceeds the target minutes | First response, resolution — anything measured against working hours |
date-field | Now passes a date taken from an issue field. The due instant is the literal wall-clock field value (it is not projected through the calendar) | A committed due date already stored on the issue |
none | Never — it is measure-only. It resolves to Met when the issue is done and shows Measuring while open | Tracking time taken without a breach verdict |
Advanced You can draft a definition from plain-language policy text with the SLA setup assistant. It emits a constrained draft only — every status and priority is snapped to a real one or dropped, and every target is format-checked. You review and save it yourself.
Step 2 — Set targets
For a duration goal, the target can vary by tier. Each tier is matched either by priority or by a JQL clause, and the first matching tier wins. So a single SLA can promise a tighter target for higher priorities.
| Tier matches | Target |
|---|---|
| Priority = Highest | 4h |
| Priority = Medium | 1d |
JQL: labels = vip | 2h |
| (default, no match) | 1d |
Tiers are evaluated top to bottom and the first match applies, so order matters: put your most specific tiers (a JQL clause, your tightest priority) above the broader fallback.
At-risk and critical thresholds
Within a duration goal, status tiers warn you before the breach. By default the warning threshold is at 50% of the target and critical at 80% — both configurable per SLA. These drive the On track → At risk → Critical → Breached progression you see on the issue panel and the Radar.
Step 3 — Configure the clock
The clock defines exactly when timing starts, pauses, stops and resets. If you configure nothing, a sensible default clock is used.
Start conditions
Choose one or more start conditions and a start mode of all (every condition must hold) or any (the first one to hold starts the clock). Conditions include: created, status reached, field is, field changed, a date field being met, first comment, resolved, and sla-state — a cross-SLA condition where this clock reacts to another SLA on the same issue being started, met, breached or stopped.
Pause conditions
Time while a pause condition holds — for example "waiting on customer" — is excluded and resumes automatically when the condition clears. Paused time shows on the issue panel as Paused — not counted.
Stop and reset conditions
Stop conditions end the clock (for example, resolved or a target status reached). Reset conditions let a clock stop and restart, producing multiple cycles.
Calc method for multiple cycles
When a clock can stop and restart, the calc method decides which cycle counts (for example, first). The issue panel shows a per-cycle Cycle breakdown with the worked time per cycle and each pause interval, recomputed on demand every time.
SLA status is never stored. It is computed on demand whenever it is needed, so configuration changes take effect immediately on every issue with no backfill.
To stop an auto-reply being counted as a first response, configure excluded actors in Settings — every clock can be made to ignore comments from automation, app accounts and named users. Status changes made by automation still count.
Step 4 — Attach a calendar
Assign a working-hours calendar so the timer honours your business hours. Nights, weekends, holidays and closed exceptions are skipped by the timer, and both elapsed time and the projected due date are computed through the calendar. If no calendar is assigned, a 24/7 calendar is used.
The calendar applies to duration targets. A date-field target breaches at the literal field value, so it is not projected through the calendar.
Step 5 — Scope it with "applies to"
Scope decides which issues the SLA applies to, across three dimensions: project keys, issue types and priorities. All specified dimensions must match (AND across dimensions), with OR within a dimension. An empty dimension means no constraint on it.
For finer control on a duration tier you can match issues with a JQL clause. A realistic example for a VIP first-response tier:
project = SUP AND issuetype = Support AND labels = vipQuartz narrows its scans to your scope at source and escapes JQL string values to prevent injection, so a large instance only ever scans the issues a definition can apply to.
Step 6 — Save and verify on a sample issue
Save and enable
Save the definition and make sure it is enabled. The change is written to the audit log.
Open a sample issue in scope
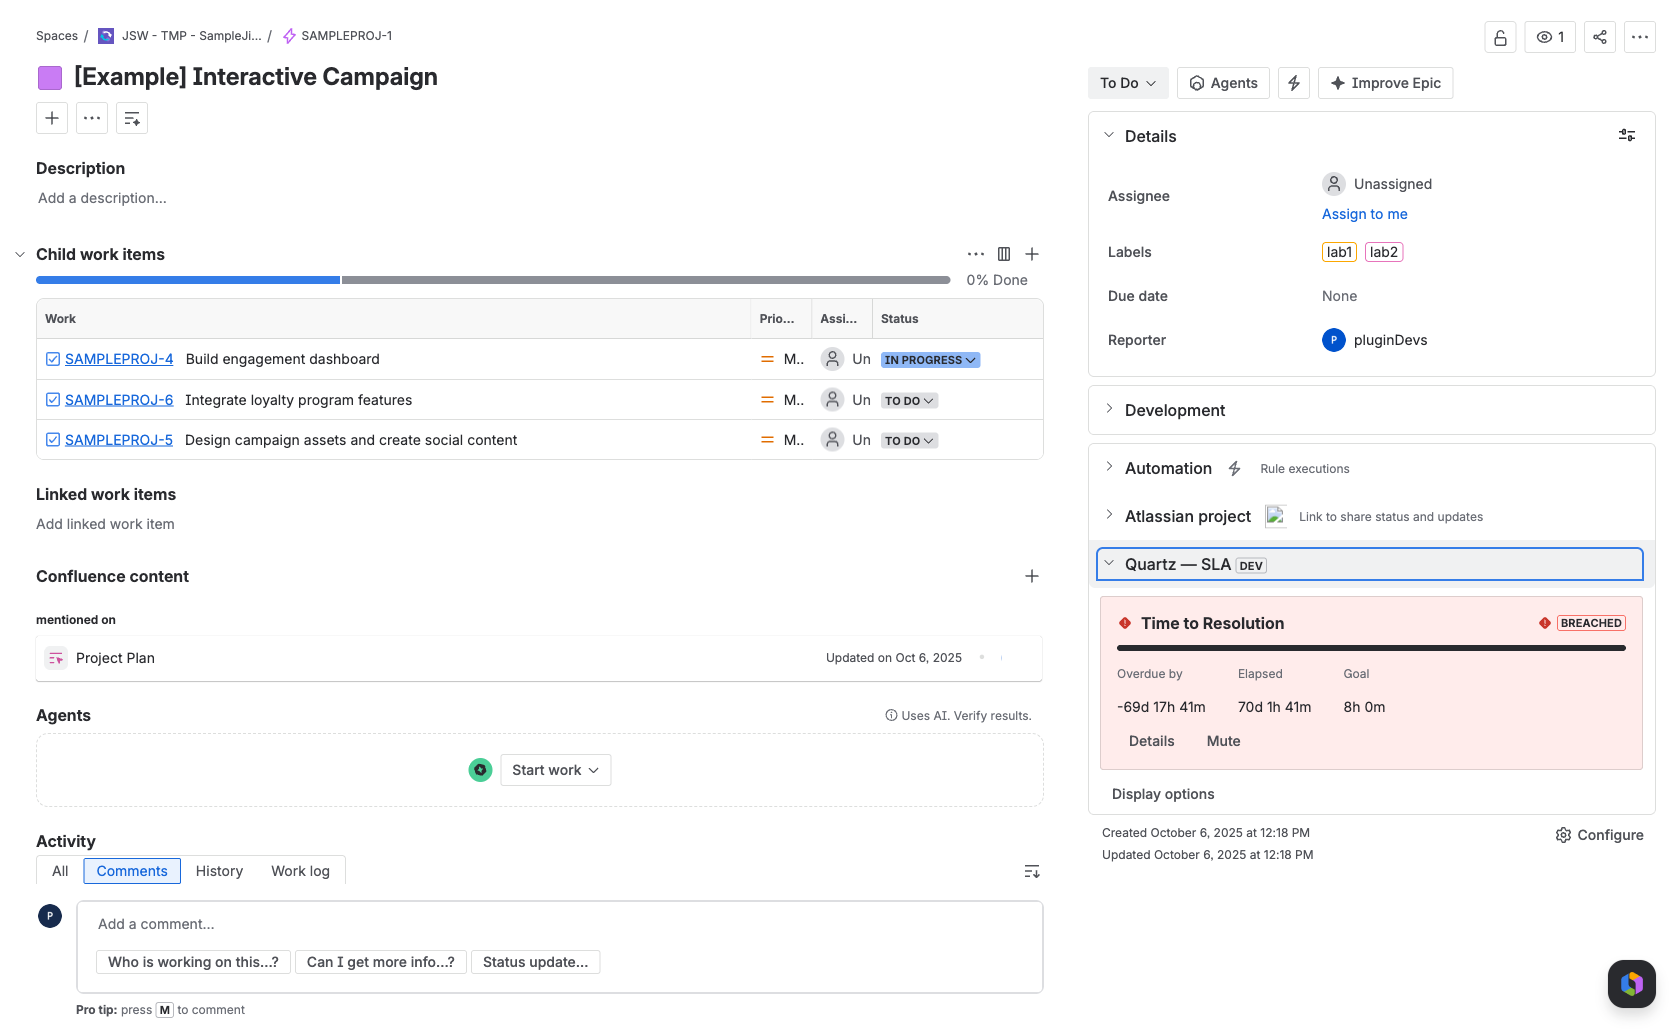
Open an issue that matches the scope. In the issue's SLA panel (titled "Quartz — SLA") you should see a tile for the new goal with a status badge, progress bar, and Elapsed / Remaining / Goal.
Check "Why this status?"
Open the Why this status? explainer to confirm the clock started when you expected, what it is waiting for, and any pause time not counted. If you do not see a tile, the No SLA applies — why? diagnostic lists each skipped SLA and the specific reason — Disabled, or Out of scope with which dimension failed.
Once it is verified, you can clone the definition as a starting point for the next goal — for example clone "Time to First Response" to build "Time to Resolution" with a different clock and target.
Was this page helpful? Yes · No · Contact support